Sunday, July 17, 2011

Twin's 21st Birthday Cards

So recently I made a 21st birthday card for my son's best friend...it was a beer and lots of pop up beers and balloons inside..you can see it here. However, the day my son's turned 21...i was still thinking of them them as little boys! Sad...i know...a bit of denial...so I made these little boy cards for them...lol....they were super fast (took about 30 minutes for both cards) and my sons didn't mind...there was $$$ inside! lol
As you can see...I used a doggie and a monkey...its from Zooballoo cartridge. I added moving eyes to the cute animals. The balloons are from George Basics cartridge and I used swiss dots to emboss them with embroidery floss for the string. Lots of pop dots as usual! They are so addicting!

Here is a close-up of Tom's Card:


Here is a close-up of Scott's Card:


Here is the inside: I used more balloons and a basic saying....


Thanks for looking!

Saturday, July 16, 2011

"Rose" Card

Im back with another card...this is a rose card that I just whipped together. I wanted to use the color red...and I thought why not make a rose card to show someone in my life how much I love them? I been using my cricut serenade for the past few cards....love their shapes. The rose print is a coloring book page and I just resized it to fit on my card. The card is 5 x 5 inches. I love the scalloped edge on the bottom. I used my cuttlebug and added more pearls. Pretty basic.
Here is a side view...as you can see the back is different than the front so when it closes it show white from the inside.
Here is a close-up of the beautiful rose. I used my coloring pencils and the diamond glaze for the shiny look. Plus more pop up dots! Just love the look!
Thanks for stopping by!

Friday, July 15, 2011

Cricut 360 Challenge #3

Hello,
Wow! Can you believe we at Cricut 360 are on our 3rd challenge already! It has been super fun for me so far...I hope it has been for you too! This week we wanted to celebrate Parents Day, which is upcoming on July 24, 2011. This gives you plenty of time to make a great card and mail it out soon. I lost my father over a year ago and so I made a card for my mother. It is pretty simple format...only took about an hour to put together...
I had this yellow flower for quite some time and nothing really to match with it....so that became the color theme. This was the very first card that I used my Cuttlebug on and OMGosh I was instantly in love with my little new bug! I used D'vine and Swiss Dots....a total must haves...
As for my beloved Cricut...I used Serenade and Zooballoo for the scallops, vines and small yellow flowers...added some pearls in the center. I distressed the edges...I totally love that look and added the doily. Like I said, pretty easy and fast.....
Hope you will join us again over at Cricut 360....for more fun, prizes and inspiration!
Here is the wonderful prize for this week!
See you there!

Tuesday, July 12, 2011

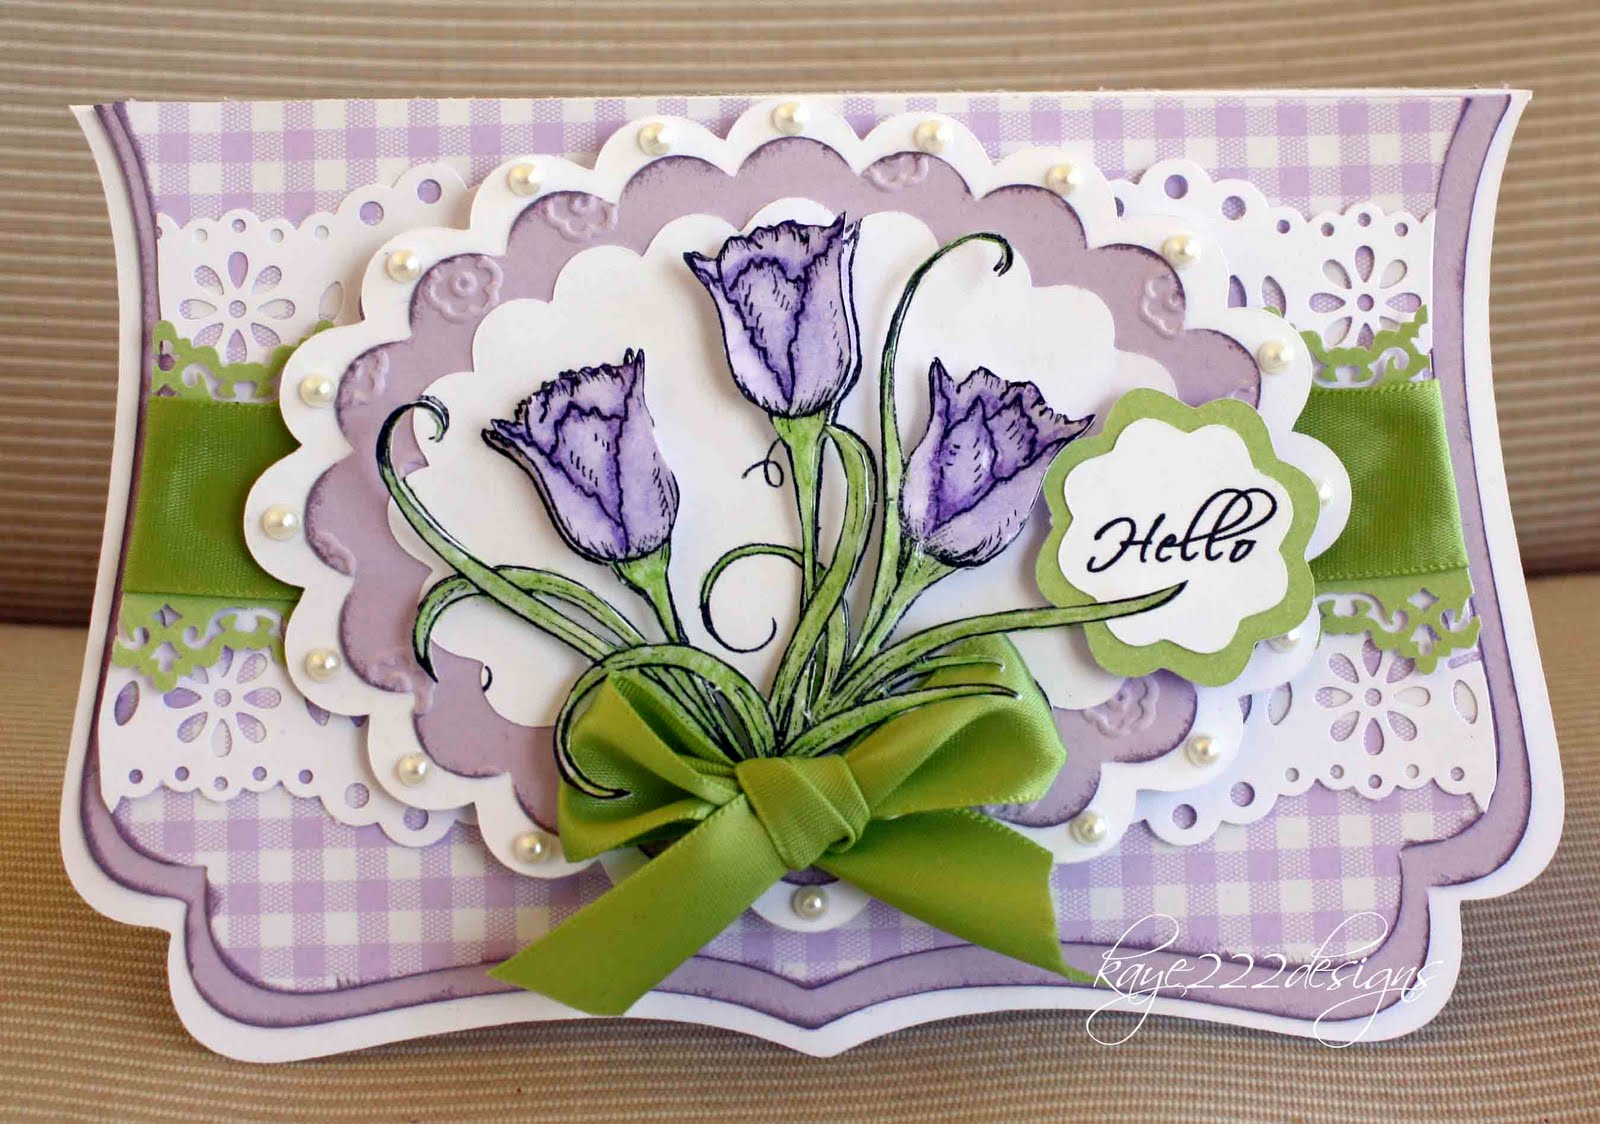
"Hello" Flower Card

"Hello"
That is the title of the card I made today. Yesterday, I made the card inspired from Heartfelt Creations and today I designed my own using the same card style from my Cricut serenade cartridge. I just love the swirl of it! These are more stamps that I broke out to use from Heartfelt Creations....I'm telling you they are so beautiful in real life. For this card, I decided to use another color that I rarely use...purple. The gingham cardstock is from Martha Stewart that I've had like years....I used two different punches...one is from Martha Stewart and the other is an old Fiskars punch. I also used Storybook cartridge and Cuttlebug-flower embosser, it came with the cuttlebug so I don't actually no the name of it? The final touches were pearls and lime green ribbon. I love this card even more than yesterday's! lol This card is slightly bigger...
6.5 x4.25, I think i like that size a little bit more....
Here is the side view...I tend to use lots of pop dots...
A close-up....my tip...I always color the stamped image underneath too and I also add diamond glaze to the top layer with foam dots....I think it makes it a bit stronger and shiner! :) My choice of coloring pencils are Prismacolor-Premier...an investment...but well worth it!
Well, hope you enjoyed this card too! Thanks for stopping by!

Monday, July 11, 2011

Flower Card

Last night I was looking at the Heartfelt Creations Cards, when I seen a beautiful card made by Sue Walsh....I love the overall designing. Thank you! So I made my own version, inspired by her card. I wanted to make it softer colors. So I used yellow and pink! OMGosh can you believe I used pink again....very rare for me! I'm hoping to send it to my mother I think because she really loves pink a lot. I have been making a few bridal shower cards lately and well, this could fall under that category too....
For this card, I used my beloved Cricut...the cartridge is sentimental. I didn't read the inside very well....duh...it makes lots of card designs...so I'm super excited about it! I also used Swiss dots on my NEW Cuttlebug! Love him too! I used Martha Stewart Lace punch and pearls along the edges. The best part is the gorgeous stamps from Heartfelt Creations! I rarely use them...but I'm so going to start now that I'm making more and more cards!
Here is a side view...as you can see I cut out the flowers and made them 3D. I also added diamond glaze to give it a shiny look with pearls!
Thanks for stopping by!

Sunday, July 10, 2011

Vintage Mini Album

This was my FIRST attempt at making a mini album. It originally was supposed to be for sb.com National Scrapbooking Week Long Challenge. However, I didn’t get it done on time, because there were so many details that I wanted to put into this album about me. I have tell you it is NOT my idea…I was totally inspired and scraplifted many components of the album from TracyTreasures24 …….I did tell her about it quite some time ago….and she wanted to see it, when it was done. I wish I could do an excellent video like she did….maybe on the next one…coming soon!

Here is the album’s front cover, side profile, and thickness..It's a 6 x 6 album


Here is the first page: It’s me as a baby! With my name and birth date, there is also journaling in the small book

Here is the next page: It’s me, my mother and father and grandmother…miss her so much! They are original photos from 1969....The opposite page is a waterfall card….it has photos and journaling too!

The next page is my father and I…we were so close when I was a little girl. He was a key, strength in my life….miss him too!
The next page I made an envelope using my cricut…I added velcro for the closure and I card with all my children’s photos in it too. I made another mini book that has journaling and photo of my dh and I inside
Here is it open for a sneak peek

The last page, I haven’t put any photos in it yet….also need to add ribbon to the tags..Otherwise it’s done!

Here is the view of the back

Hope you were inspired like I was…. J

Saturday, July 9, 2011

Bridal Shower Card #3

Hi
Im back again with another card for the bridal shower....if you notice they are all in blues... :)
This card is a basic dress template and I ran it through my NEW cuttlebug! Woo Hoo! I had no idea it was a must have??? I love how it embosses so fabulous! So on the dress I embossed in D'Vine and the background blue is Swiss Dots. I added some flowers of course and I also made my FIRST hanger...I need a bit more practice...There are also elegant pearls on the top. I just used the basic format I already had...since its FAUX again....I was debating weather I should have put all the inside information on an inside of the card....well, its a general design...the point is really to show the embossing and dress template....
Here is a close-up shot of the embossing, flowers, pearls and hanger...
Thanks for stopping by....I appreciate any feedback or changes....Hugs!

Friday, July 8, 2011

Cricut 360 Challenge #2

Hello and Welcome back!
We over at Cricut 360 wanted to thank you for playing along in our challenges! Our first challenge was our invitation to join us over at Cricut 360. Now we wanted to thank you for your participation and hope you tell your friends and come back to play every week!
I know I have enjoyed making cards and it is a perfect opportunity to not only make some cards for your stash, but to also win some great prizes!
So this week's challenge #2 is for you to make a THANK YOU card in a CIRCLE!
Here is my Thanks You circle card for the week! Its my FIRST CIRCLE CARD....so fun!

Card from the side:

This is my very FIRST circle card! I was super worried how I was going to pull it off because I dont own a die cutter that makes amazing circle cards. Then, as I was looking through my cricut cartridges...I realized Joys of the Season has a christmas bulb on it and well I just cut off the bulb from the top and presto! Instant circle card! I also used George for the circles and tag....my favorite cricut guy. In addition, I used Serenade for the scalloped circles and ferns. I added ribbon and a doily to give this card a fresh off the farm look. The strawberries I found on line clip art and added stickles in green and black...then with pop dots under them...this card was complete!
So come on over to this week's Cricut 360 Challenge #2 for some more great fun, inspiration and a chance to win a PRIZE! Here is the PRIZE for this week:
See you over there!

Wednesday, July 6, 2011

Just wanted to say "Boo!"

Hi Everyone,
I know its not Halloween, but I wanted to share my FIRST side step card (Link) Thank You Beate!... that I made today. I really had a fun time making it...lots of tiny details...a bit tedious...but I'm so happy with the ending result! This card is for someone special in my life and I really hope two things? One she loves it...and two she doesn't see it here? I don't know if she follows me on my blog? Well, even if she does...it still will be a surprise because the photos don't give it much justice....its really glittery! I used my Cricut for everything except the card base and the witch....I used Happy Hauntings...
Here is the front view:
Here it is a bit open to see the steps:
I even used string on the bottom so when it opens it will stay perfectly in place.
Here is the back with the journaling...sorry its private...but you get the idea....:)
Hope you try your FIRST side step card too! Its super fun!
Thanks for stopping by....

Sunday, July 3, 2011

Fast, Fun Fireworks

I love the 4th of July! It is my favorite holiday of the year...I love the  fireworks, family, parades and BBQ's. Many great memories over the years! To  celebrate I made a fun card, Ive been on a super card kick lately! lol  Since I love fireworks so much and love making my own embellishments....I made  these super fast, fun fireworks for you to put on your 4th of July invitations  for next year or for your holiday layouts. 
Here is what you need:  Blue/Red Cardstock....1.5 inch trianlges x 2  Cream/White Cardtock...2 inch rectangles x 2  Red/Blue quilling strips or 1/8inch cardstock strips  Glue  Scissors  Fiber  Popsicle Stick
First, take the quilling strip and just glue across at an angle every 1/4inch,  cut of the ends to the end of the rectangle
Second, glue the triangle up on the top.
Third, flip over and glue half of the popsicle stick and the fiber. 
Fourth, glue the other rectangle down and THEN the triangle...DONE! :)
Here are two example of the finished fireworks in Red and in Blue 
Now on a 6 x 6 card for next years invitations!
Hope you enjoyed and try some fast, fun fireworks for your next project! 
Happy 4th of July!!