Showing posts with label Want 2 Scrap. Show all posts

Thursday, February 21, 2013

Blue Jeans *Donna Salazar*

Hi my scrappy friends!
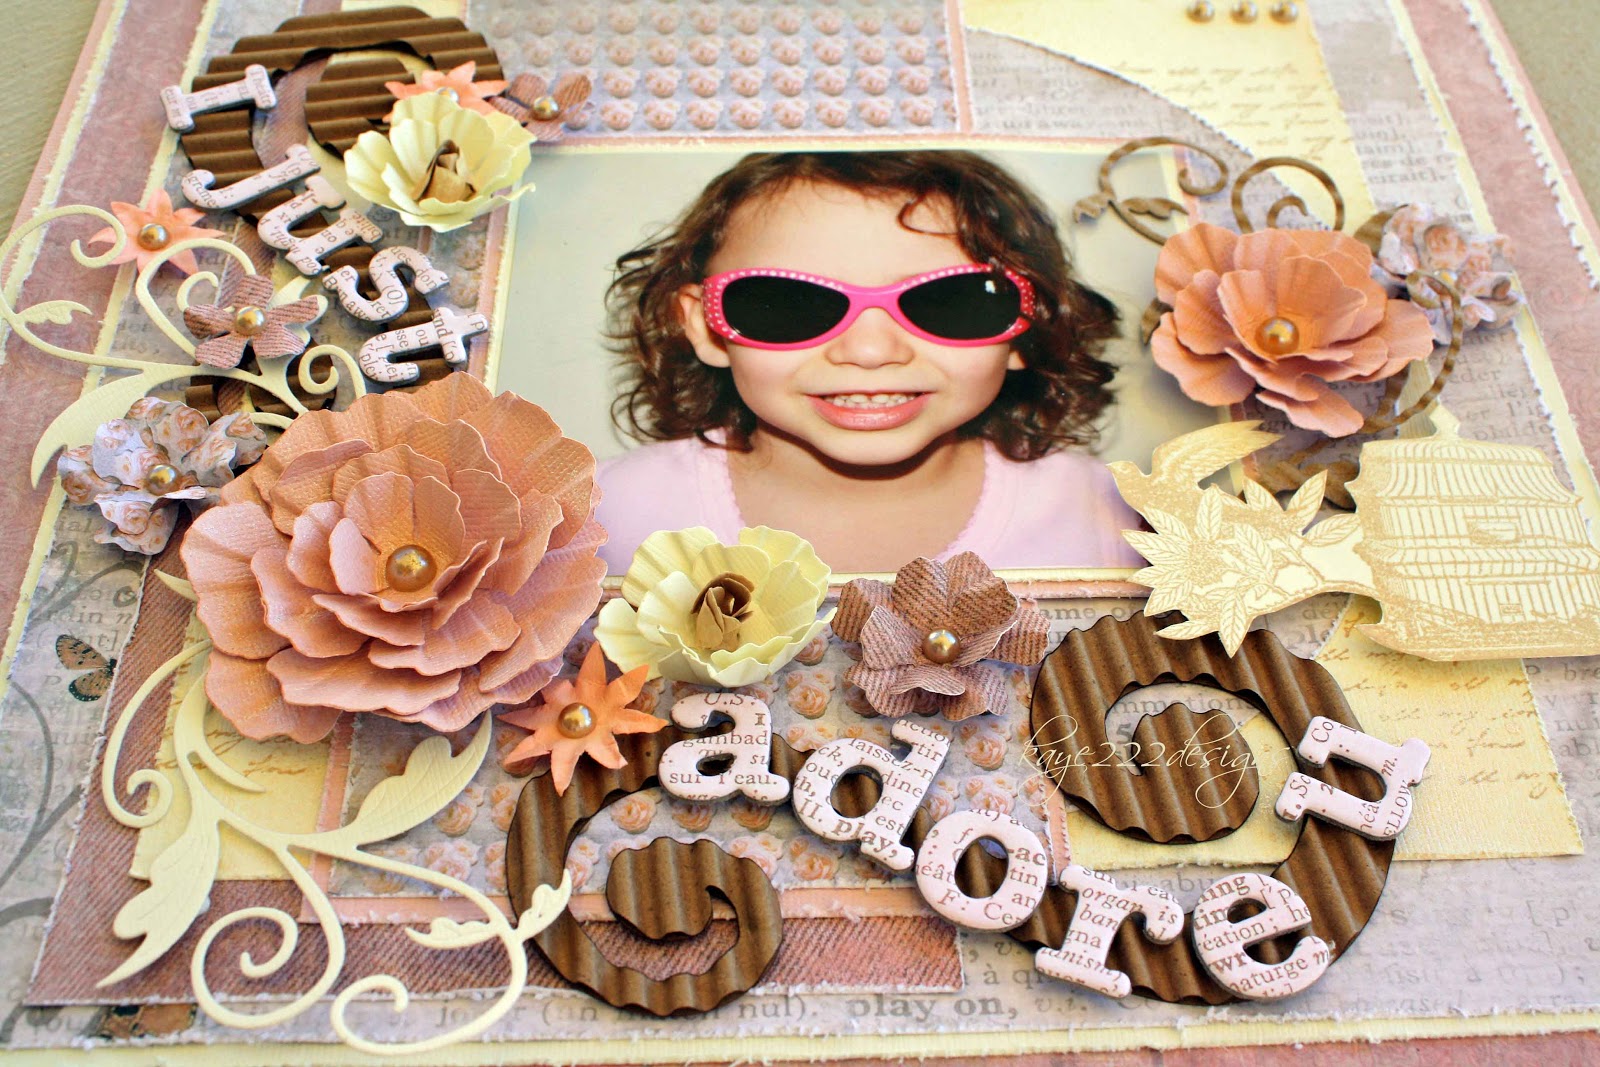
Its Lisa today sharing a tutorial on how to make felt roses. It really is easy using Donna's "Bitty Blossoms". Felt flowers seem to in lately and buying your own felt makes it not only convenient but also super cheap! Here is my layout using the amazing Family Jeans Paper Collection. This is a photo of my little Roxy and in her blue jeans.


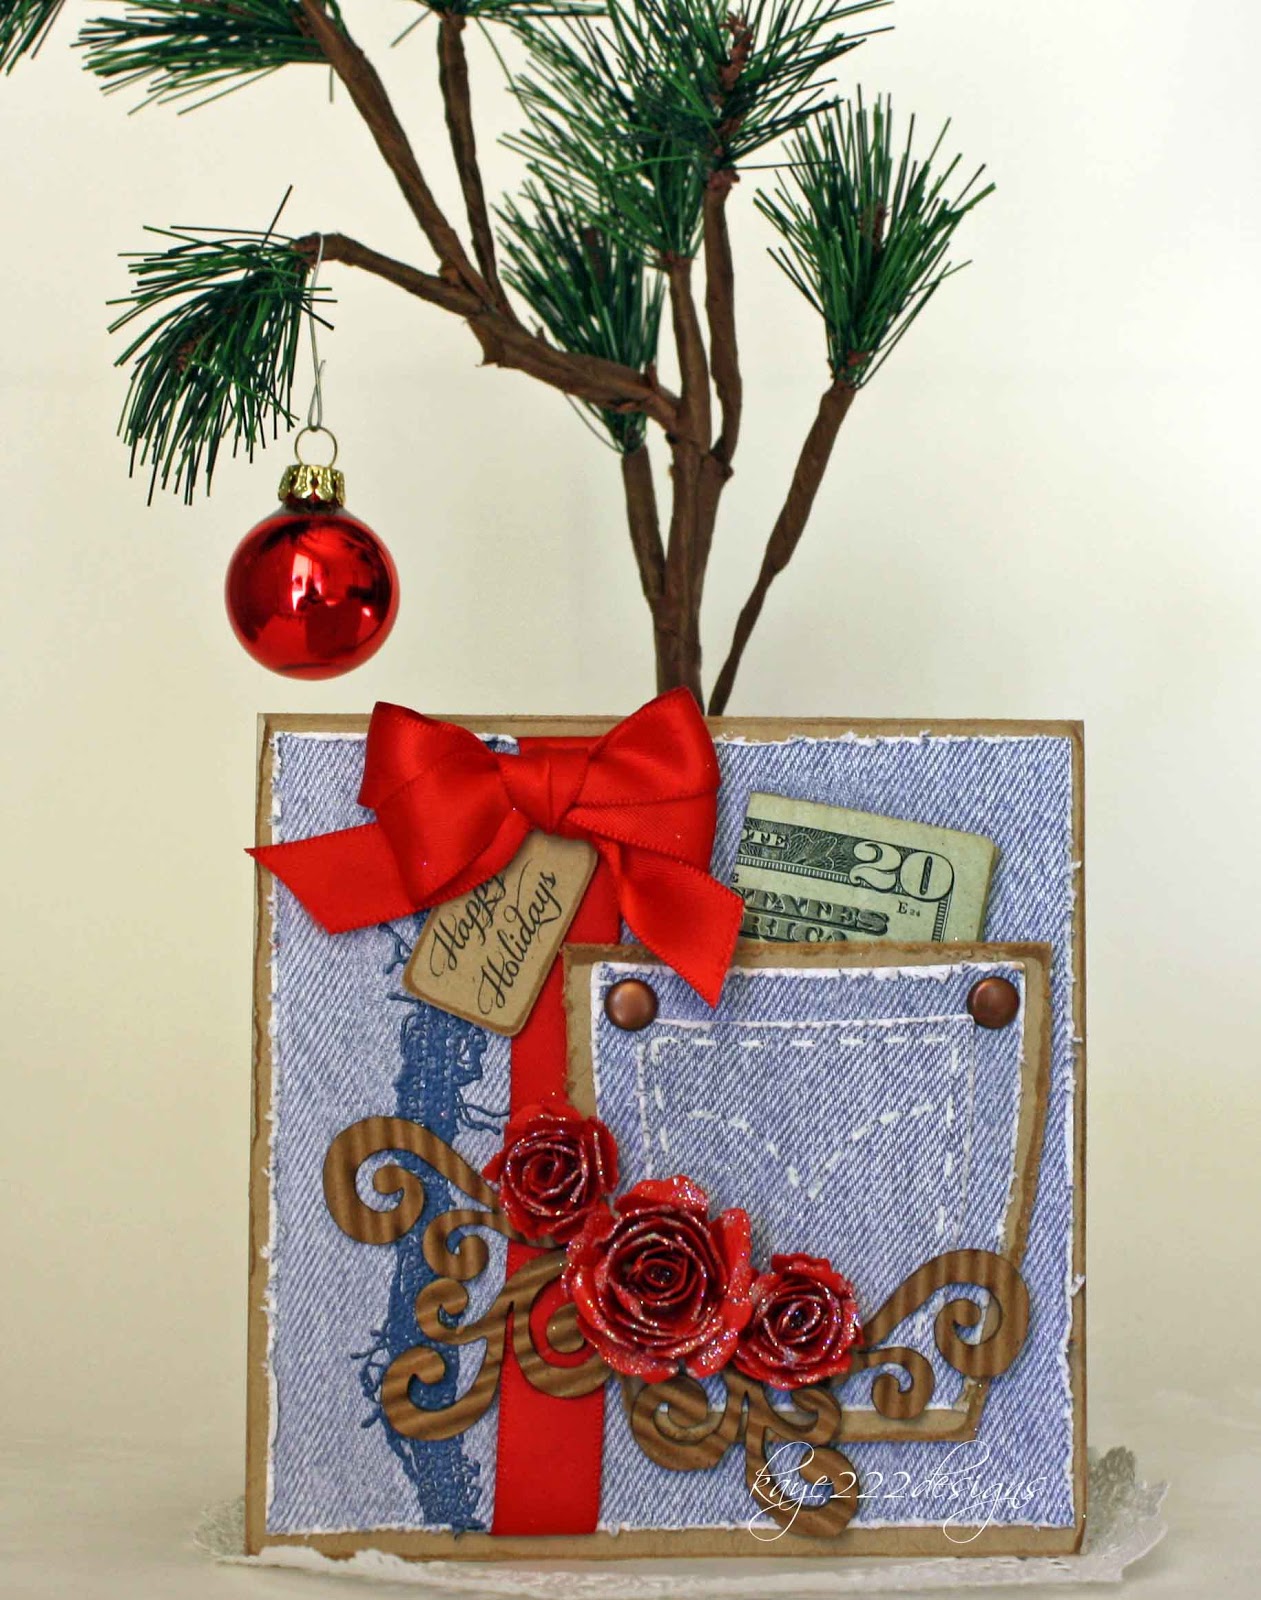
Here is a closer view of the blue felt roses. 


First, take a piece of felt and cut it to fit your diecut machine. 
I bought my felt at Michael's full price for 20 cents! lol


Using the largest of Bitty Blossoms...Run it through the diecut machine a few times. 
If it sticks a bit just cut edges with scissors. You should see the lines. 


The biggest part of making these flowers is applying the glue all the way around before you start rolling them. I use a fast drying glue like Art Glitter-Clear. The roll the edges like you do with paper, I also use a wooden stick in the center and then pull it out when Im done.


Ta Da! Your felt flower is done! 


Another view of the felt flower and layering of a yellow rose using 3 layers. 


Gotta LOVE the chippie letters in this "Family Jeans" collection.


An angled view of the dimensions of the flowers and pop dots throughout.


Hope you enjoyed and start making your own felt flowers too...
I just love when I can save some money to spend it somewhere else. :)
Have a great day! 
xoxo

Products Used:

GCD Studios-Family Jeans Collection
GCD Studios- Family Jeans- Chipboard Alphas


Saturday, January 5, 2013

I Just Adore You *Donna Salazar NEW Natural Beauty Collection*

Hello everyone! I sure hope you had a Happy New Year! 
It's Lisa back with some fabulous new layouts and cards for the upcoming month's ahead.
Today, I am sharing with you a new layout that you might see at the upcoming CHA this month.
I used Donna Salazar's BEAUTIFUL new line of papers called "Natural Beauty" by GCD Studios.
Let me tell you....these papers are really AMAZING!!!
They are so soft and delicate but also have Donna's fabulous touch with denim and wood backgrounds. 
This is a photo of my adorable little niece, Emma. She is such a doll! When I took this photo of her I was visiting my brother's New baby twin sons. Twins run in our family...I have them too :)
So as I was taking photos of the boys, my little Emma jumped in front of the camera and said to me...
"Auntie Lisa, take my picture too"...lol... kids say the cutest things :)


I used Want 2 Scrap corrugated swirls and the chipboard letters from the "natural beauty" collection.
I really like the size of these letters and they fit great right over the top of the swirls.
The birdcage was fussy cut out and it is a stamp called "Free As A Bird". It was stamped on cream cardstock with Donna's NEW Mix'd Media Chox-Driftwood. I also stamped on the cream background making my own paper using "All My Love"


I made lots of flowers using "Rose Creations" As you can see, you can curl them or crimp them to get different looks. Also a little bit closer view of the beautiful letters. 


A 3D view of the flowers and cardboard pieces. It pops off the page just the right amount. :) 


I'm so glad you stopped by and be sure to be looking for lots of new projects using Donna's NEW line of papers, because there are 3 of them!!! Yes 3!!! So exciting!!
Have a great New Year...
xoxo

Products Used:


Wednesday, December 19, 2012

Proud Of You! *Donna Salazar*

Hi, Its Lisa once again this month sharing with you a 
New Layout of my daughter and my mother this past spring 
during my daughter's 2012 College Graduation. 
Im soooo Proud Of You! 
Recently, I seemed to have lost my mojo for layouts 
but it came easy this time using the great papers 
that matched my daughter's cap and gown from ASU 
from the Botanique Collection and fun swirls matching the background by Donna. 


Here you can see the beautiful roses from "bitty blossoms" and "rose creations" 
they really go great with the patterned papers that have roses printed on them. 
Loving the swirls huh? me too!


I used some left over sprockets that I had from another project and I fussy cut out the roses with harps. 
The sentiments are on the "botanique paper" and I used my fancy tags to cut them out. 


Here you can see a 3D view of the layering. Lots of distressed edges and 
I also used my crimper to match the awesome swirls too. :)


Hope you enjoyed my layout for I really am proud to scrap this photo
of my daughter and my mother....to me it is priceless. 
Have a great Holiday Season and see you next year!
Hugs 
xoxo

Products Used:

Crafty Chronicle- Younique

Wednesday, December 5, 2012

Christmas Blue Jean Gift Card * Donna Salazar*

Hello my scrappy friends! 
It's Lisa back again with a new tutorial gift card perfect for this holiday season or anytime of the year.
This gift card is great for teenagers and those of us who love blue jeans, 
but also you can write an entire sentiment inside too because it is a regular card. 
So here is the finished card, I love red but you can use your favorite colors 
since blue jeans go with everything. :)


A little closer view of the "jean pocket" and fabulous "bitty blossoms" roses.


So lets get started...should take about 30 minutes...yep that's it!
First, cut a piece of kraft cardstock 5 x 10 inches long then fold in half at 5 inches.


Cut a piece of 4.75 x 4.75 inches "storybook paper" and stamp the "tattered" with "denim mix'd media inx and demin embossing power" dry with embossing tool. *It is 1 inch on the left.*


Diecut 2 smallest "pocket and swirls"


Distress all 3 pieces with your "zutter"
I also doodled with a white signo pen the lines on the smaller "pocket"
You can also sew on it if you like.


Using the NEW "Chox" in driftwood chalk the edges of the card.
Cut a piece of kraft to place behind the pocket, distress with the "zutter" and chalk edges.
Add rustic brads to match the kraft in the corners.


Next choose your ribbon color and wrap around the "storybook paper" before 
you glue it down to your base of the card.
Add small pop dots behind the "pocket"


Make 2 medium and 1 large "bitty blossoms" and glitter using "fairy dust glitter"
pralines and cream and "glue gloss"


Glue down as shown here and add the "hand drawn corrugated swirls"
Make a tag with sentiment in kraft and chalk edges with "chox" driftwood. 
Add a matching bow on the top.
 Don't forget to place a gift card or $$$ in the pocket. :)


Your gift card is ready to go with lots of love.
Hope you were inspired to make yours soon!
Have a great holiday season.
xoxo

Products Used:


Monday, November 5, 2012

Great Friends *Donna Salazar*

Hello my scrappy friends! 
Its Lisa back with a new 8.6 x 11 inch layout featuring Michelle and her great friend Debbie that she recently visited. Such a great photo to cherish! 
I was in a pink mood today and Im so glad it came together exactly how I imagined it. 
Love when that happens!
I used some of Donna's NEW fabulous chippies and LOVE the new swirl stamp! 
They really compliment each other so well as you can see. :)


I did some fussy cutting of flowers and blended them in the rest of the flowers. 
I also had to use my favorite roses "bitty blossoms" and "rose creations" 
All the chippy swirls and stamped swirls are inked with 
"chiffon" mixd media inx and embossing powder. 


I didnt have layer too much because the papers are really beautiful the grey and pinks work so well together but I did sneak a little bit of "chronicles" behind the photo. 


I hope Michelle likes it and I really had fun with all the pinks today! 
Have a great week
hugs
xoxo

Products Used:


Wednesday, October 24, 2012

Heartfelt Wednesday's

Today I decided to make a card using more of the lovely "Vintage Floret Collection"
I tend to go toward greens a lot but the papers have a hint of yellows in them so I wanted to enhance it up a little bit. :)


A side view using smaller pop dots and this time some bling in matching green.


A closer view of those amazing yellow stamped roses and diecut...A total must have! 
The "happy birthday" stamp has more to the sentiment but I decided to use part of it. 


Hope you enjoyed....short post today...
Be sure to stop by the HC blog and also to see the new DT. 
xoxo

Friday, October 5, 2012

Purrrrfect! *Donna Salazar*

Hi Welcome back to Donna's Blog!
It's Lisa once again with a layout to share with you. 
As you might know, we have been sharing photos with each other for 
our "scrapbook circle" between DT members. 
Today, I made my first 8.5 x 11 inch layout for Jessy Christopher. 
I was a bit scared to work on a smaller palette...but know I love the size! lol
It is an adorable photo of her and her kitty. 
I loved the colors in her photo and it was like it was meant to be to 
match all of Donna's fabulous papers! Purrrrfect!


Here are some of those amazing purrrrfect flowers!


I just love this branch, I diecut it and then embossed it with clear embossing powder to give it a shine.


Here you can see how the corrugated cardboard and flowers pop off the page. 


Hope you enjoyed! 
Have a wonderful day!
xoxo

Products Used:


Wednesday, September 5, 2012

Create Your Own Dreams *Donna Salazar*

Hello my scrappy friends...It's Lisa back again with a card that I wanted to share with you using Donna Salazar's awesome products. So many designs I make are with scrapbook layouts, but I love making cards too! So for all of your cardmakers out there...this one is for you! I love making 5 x 6 inch cards because they fit so nicely in a standard card envelope. I was on a grunge look last time and now Im back to the shabby chic look that I love especially in pink colors. 


The base is white cardstock and I layered it with a dusty pink cardstock and distressed the edges. 
Next using "botanique" papers I used the double sided paper and cut in half. I embossed the pink side with the stamp "all my love" and attached them together. Next I added the ribbons before I glued it down to the base of the card. Then of course lots of embellishments and doily. :)


I made little clouds and stamped with "words and banners" in black ink. All the pearls on the lacey circles are from donna's "sprockets" bling...it sure is great to go from grunge to shabby chic with all those pearls...the possibilities are endless. The cute chipboard bird was inked in "jasmine" ink and then embossed with "jasmine" embossing powder. I just love that white...but Im almost out! Guess I need to buy some more real soon! lol


As always, I cant stop using these AMAZING "bitty blossoms" they are perfect for all kinds of projects 
I even used the leaves this time and I embossed them with the spellbinders machine...also don't forget all your pop dots to give your card that 3D look that we all love! 


Hope you have a great day!
hugs

Products used:


Wednesday, August 22, 2012

Heartfelt Wednesday's "Jesus the Reason..."

Welcome back to another Heartfelt Wednesday using more of the "Ornamental Light" collection.
Last week I used lots of the blues in the collection and this week I wanted to use my favorite color...RED! This card was super fast to make..it only took about 15 minutes. 
It is perfect for making in mass quantities for this upcoming Christmas season. :)
Such a warm color and a beautiful warm sentiment to give to loved ones and friends.


The bling is from Want 2 Scrap...Donna Salazar'a sprocket pearls.


I made a triple looped bow in white satin and the flowers just pop up a little bit


Here are the instructions to make your own cards in just a a few minutes...it is never too early to start those holiday cards! 

Heartfelt Creations Supplies

Other Supplies
Bazzil & Recollections Cardstock, Want 2 Scrap Sprocket Pearls, Recollections Pop Dots, Staz-on Black Ink, Copic Marker, Glitter Smooch-Frost, Ribbon

Instructions
Card takes approximately 15 minutes to make. Base of card is 5 x 6 inches in white cardstock. Cut in red cardstock 4.5 x 5. 5 inches. Cut white cardstock 4.25 x 5.25 inches. Cut red poinsettia patterned paper from “frosty blanket paper” 4 x 5 inches. Place white satin ribbon around patterned paper and layer/glue all papers on base of card. Diecut 2 “Parisian motifs” in white cardstock, place pop dots in between pieces and turn slightly. Cut one circle in red cardstock 2.75 inches and one circle in white cardstock 2.5 inches. Stamp on white with “yuletide sentiments” in black. Glue 2 pieces together and add pearl bling around white edge of circle. Stamp 6 smallest of the “petite poinsettias” in black and diecut with “layered poinsettia” color inside with red copic marker and add glitter smooch. Glue 2 together and add pearls in centers, a total of 3 flowers. Tie a triple looped bow in white satin and add more pearls in center of bow. Place bow on bottom right corner and flowers as shown.

Be sure to stop by the HC Blog for more fabulous creations this week! 
Have a great day!
Hugs