Showing posts with label Gift Card. Show all posts

Wednesday, December 5, 2012

Christmas Blue Jean Gift Card * Donna Salazar*

Hello my scrappy friends! 
It's Lisa back again with a new tutorial gift card perfect for this holiday season or anytime of the year.
This gift card is great for teenagers and those of us who love blue jeans, 
but also you can write an entire sentiment inside too because it is a regular card. 
So here is the finished card, I love red but you can use your favorite colors 
since blue jeans go with everything. :)


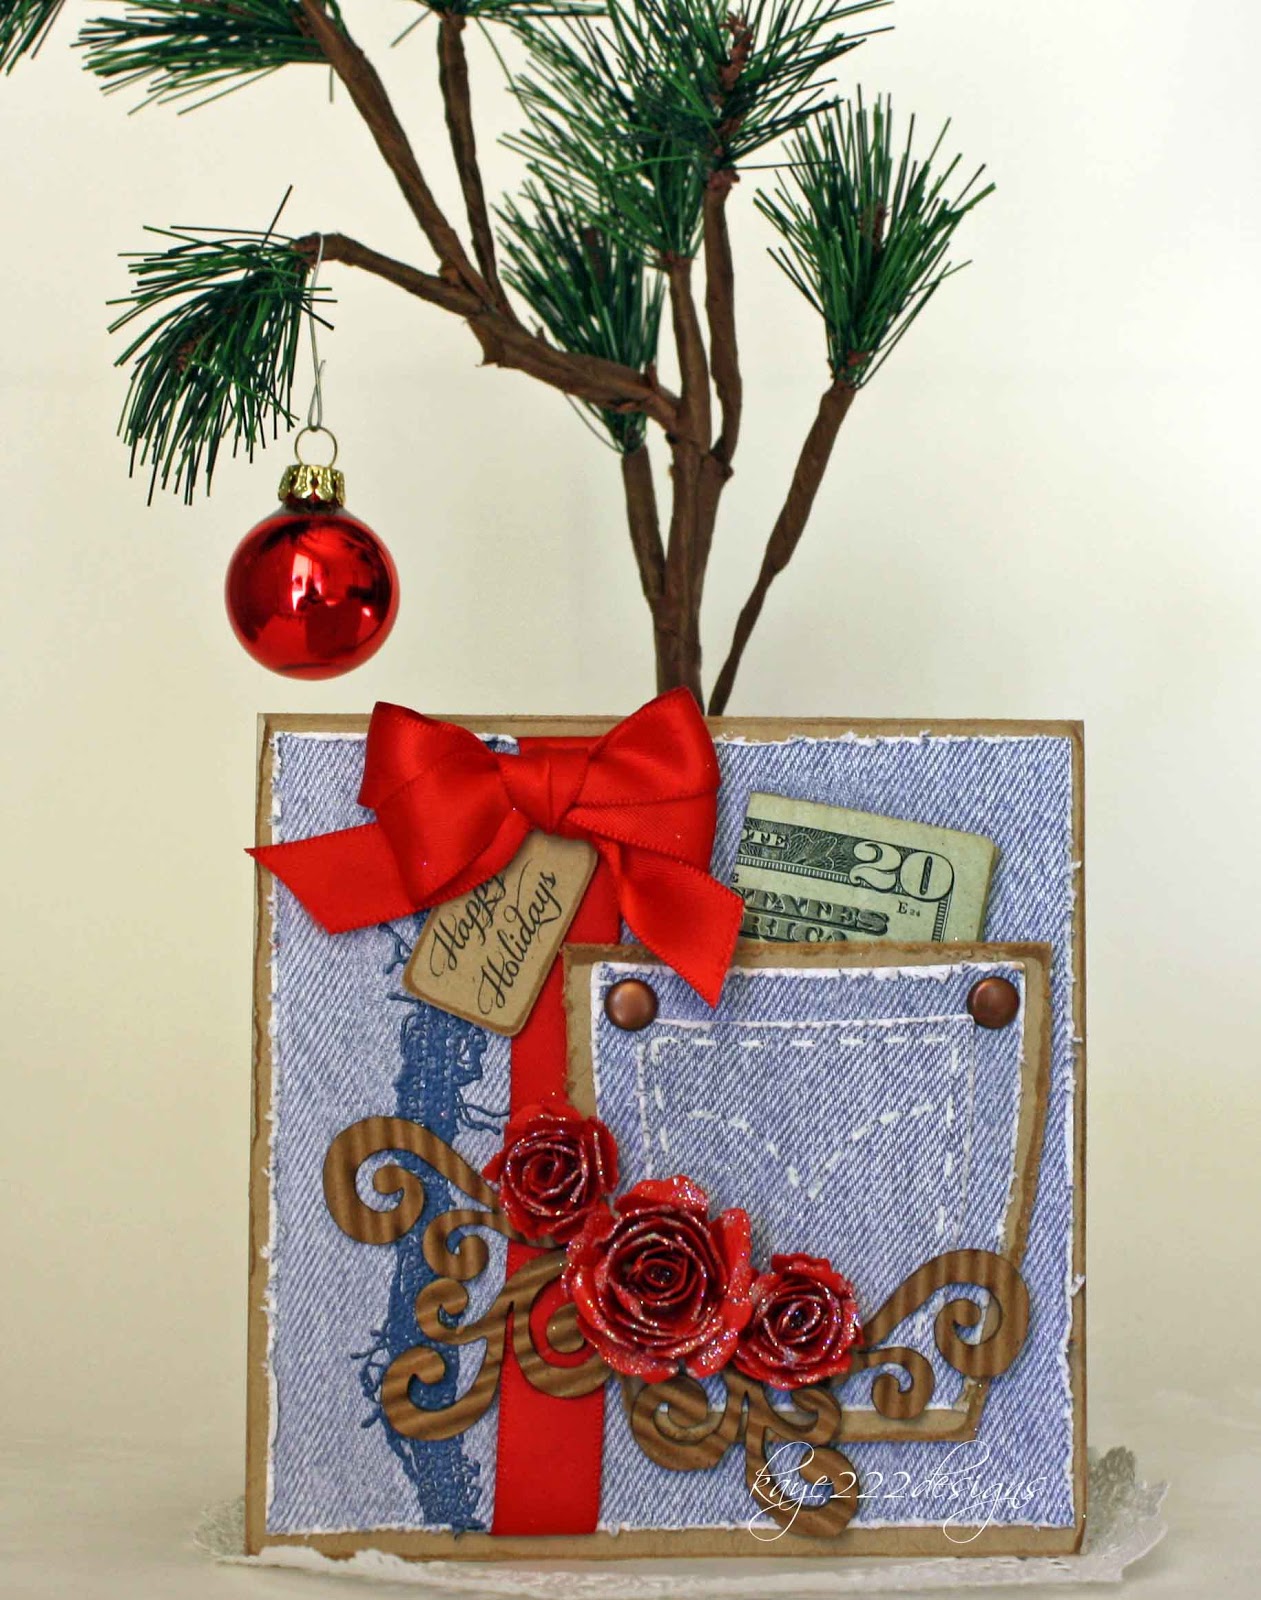
A little closer view of the "jean pocket" and fabulous "bitty blossoms" roses.


So lets get started...should take about 30 minutes...yep that's it!
First, cut a piece of kraft cardstock 5 x 10 inches long then fold in half at 5 inches.


Cut a piece of 4.75 x 4.75 inches "storybook paper" and stamp the "tattered" with "denim mix'd media inx and demin embossing power" dry with embossing tool. *It is 1 inch on the left.*


Diecut 2 smallest "pocket and swirls"


Distress all 3 pieces with your "zutter"
I also doodled with a white signo pen the lines on the smaller "pocket"
You can also sew on it if you like.


Using the NEW "Chox" in driftwood chalk the edges of the card.
Cut a piece of kraft to place behind the pocket, distress with the "zutter" and chalk edges.
Add rustic brads to match the kraft in the corners.


Next choose your ribbon color and wrap around the "storybook paper" before 
you glue it down to your base of the card.
Add small pop dots behind the "pocket"


Make 2 medium and 1 large "bitty blossoms" and glitter using "fairy dust glitter"
pralines and cream and "glue gloss"


Glue down as shown here and add the "hand drawn corrugated swirls"
Make a tag with sentiment in kraft and chalk edges with "chox" driftwood. 
Add a matching bow on the top.
 Don't forget to place a gift card or $$$ in the pocket. :)


Your gift card is ready to go with lots of love.
Hope you were inspired to make yours soon!
Have a great holiday season.
xoxo

Products Used:


Sunday, February 5, 2012

Designer Gift Card Purse

Good Morning!
Hope everyone has a safe an fun "Superbowl" day! I watch parts of the game, but I'm not a huge football girl....So I will get the afternoon to play in my scraproom again! :)
Over at scrapbook.com in the challenges this month there is a purse card....so I looked up online to see how to make one...never made one before...I came across Dawn's tutorial at Stampin Up and it is fabulous! You can see it HERE. So I followed the basics of the card and added some extras and tweaked it a bit to make my Coco Chanel inspired Gift Card Purse.
So who wouldn't love to have this purse? lol

I just used my son's family discount card from Target for an example.... :) Maybe a Neiman Marcus or Nordstrom card would be nice? lol


Here is what you need:
Black and White Smooth Cardstock
26 gauge wire-silver
3 pearls
Martha Stewart Scoring Board
Spellbinders-Labels 20
Round Velcro
Black Ribbon
Skewer

First, cut a 6x6 inch cardstock in black and fold in half. Using the largest Labels 20 die cut in black cardstock. Place die cut over the folded black cardstock and mark with pencil where it meets. That will be your line to cut and line up at an angle and cut from pencil line to corner.


Next, cut white paper 5.5 inches x 2.5 inches, follow the same cutting as the black paper. Do this twice. One for the front of the purse and one for the back. Die cut 2nd to the largest Spellbinders Labels 20 in white cardstock. Using the Martha Stewart Scoring Board, place all the pieces of the white cardstock at and angle and score every half inch until you have a criss- cross pattern. If you have the embossing template, that will work too! I don't have it....but it is pretty fast to do by hand if you don't either. :) Also make a score lines on top x 2 about .5 inches apart. (Shown above in black)


Glue White cardstock on the black cardstock as shown in finished card. Leave the top of the purse off until after the handle is done.

Using the 26 gauge wire wrap it around something very thin....I used a skewer for mine. Then wrap black satin ribbon around the wire. Approximately 8.5 inches long, give or take. Punch holes on top of purse and put wired ribbon through each hole and crimp wire together in the center. You should be able to do this with your fingers. Glue down back of purse to the back.


On the inside top place the Velcro and line it up with the bottom...place clear baggie inside for gift card and add 3 white pearls to the front and last but not least the Coco Chanel signature! I used my cricut, George Basics, cut .75 inch "C's" x 2 and glue them together.


This adorable little purse will certainly be the talk of the town....
Hope you enjoyed!


Designer Gift Card Purse #2

Ok, since this morning's tutorial I had the leftover pieces in black and I figured instead of making another Chanel inspired purse why not make a Gucci inspired purse? This purse is using the same basics except even easier! I just have the purse bottom and top in black. Then, I cut dark green and red paper in 1 inch for the bottom part (front and back) and the top part is 1 inch red and .5 inch green on each side (front and back). I added a gold brad and put the Velcro on top of the brad. The ribbon is just black satin with NO wire. Super fast and easy!


I had so much fun with these purses....which designer purse will be next? hum????