Sunday, August 5, 2012

Caribbean Queen *Donna Salazar*

Hello, my scrappy friends! It is Lisa back again with a new layout using Donna's fabulous products! 
I have had this photo for a long time of my Roxy and I wanted to use yellows and blues....well ta da! 
With Donna's beautiful papers I was able to make this amazing design to share with you today. 
Lots of layering here and it is a bit busy but it only took 2 hours to make...weird huh? 


The big Rose is basically light yellow paper and I just added "denim" ink and embossing powder in spots to make it look unique. I cant stop using my "bitty blossoms" either....lol...they are 2 large in yellow and one medium in white cardstock 


On the birdcage I added a bit of the left over denim that I had from under the circle.
Love the butterfly bling too....they are soooo beautiful! 


For the chipboard, I just inked it with "denim" and heat dried it....


Here is a 3D view...I really love how it came out. 


Hope you enjoyed my latest project. :)
Have a great day! 
hugs...

Products Used: 


Saturday, August 4, 2012

A Walk in the Clouds

Hello everyone!
I hope you are having a great weekend! I have been on this monochromatic mode lately and here is a new one using light baby blues with small touches of brighter blues. This is another older photo of Roxy and I wanted to use it for this cloud theme. It looks like she is a peace and so relaxed. So I started to think of heaven and how peaceful it must be...
Since the clouds are like the heavens, I thought it would be a good to incorporate lots of blues and clouds, making it feel like I was in heaven too! 
I also took the photos today in the direct sunlight so it would look like clouds with the shadows... :)


Here I added a little cherub that I printed from the internet and I added extra wings using Donna's 
Mix'd Media Elements Diecut and tiny pearls using my Ranger pearl stickles. Lots of flowers, most are prima with the exception of the roses that are made using "bitty blossoms" by Spellbinders.


Here you can see I used more liquid pearls around all my journaling (lots of it today)  and I also added lots of clouds using my cricut "serenade". The "floral ovals" frame has to be one of my favorite spellbinders diecuts lately....so many beautiful details... :)


Here you can see I added some cottonballs to give the clouds a real feel to it. The bling is from BYOB from Donna and it is so great to add just a touch here and there. The background paper is plain white cardstock that I misted and stamped in white in areas....it is really great to make your own papers when you need to match it perfectly... :)


I hope you enjoyed today's Walk in the Clouds...
My you walk in the clouds too!
hugs! 

Friday, August 3, 2012

All Spruced Up *OUAS*

Hi, Welcome back...Today, Im sharing with you a layout that I made for the "Once Upon A Sketch" for the month of August. I really enjoyed making one last month and Nadia's sketches are so beautiful! 
The sketch has a lot of negative space and so that was a bit hard for me to keep exactly the same as the sketch. So I added a little bit more to it, but generally it is the same. 
So here is the sketch this month: The theme is seasons:


So here is my interpretation of the sketch. I chose winter as my theme. I recently made some beach themed layouts with fences and I didnt really want to make another of the same kind. I have seen beautiful winter fences with lots of garland and ribbons for the christmas season. That is how my whole layout evolved...by making fences using Heartfelt Creations "Classic Editions" and linking them together. I then punched out several small ferns and glued them to the top. I added tiny ribbons in the centers. So if it is Christmas time, one must have beautiful poinsettias. I chose white with gold embossing and layered them. I only made a few because I used some of my prima leaves and I didn't want it to be overwhelming. All the patterned papers are from Martha Stewart.


Here is a closer view of the poinsettias and the fence.


More fence up on the top.


Lots of cherry lynn swirls in gold paper with a few snowflakes made with 2 different punches from bunch punch. The trees in the background are from Heartfelt Creations.


A few more stamped trees and the title/journaling. I added a few pearls to the top of the fancy tag.


I know it is a bit early for Christmas layouts but Im really glad Im doing some old photos that need to be done too!
Thanks for stopping by and have a great day!
hugs!

Thursday, August 2, 2012

So Very Thankful

Hello scrappy friends! 
So I made this card for Heartfelt Creations for next week?? But then I realized the NEW Collection is coming out...I must have been thinking another week or something? Duh! 
So Im sharing another card from the "Classic Editions" 
As you can see they are so perfect for this coming autumn. :)


I used some of their brand NEW papers from the collection and well as some of the NEW stamps. 
I had to add a beautiful rose in orange with some bling too!


The tree is embossed and the title is fonts from the computer. 


Thanks for stopping by and have a great day! 
xoxo

Wednesday, August 1, 2012

Heartfelt Wednesday's *Harvest Blessings*

Happy Wednesday! Sharing with you this week a new card for Heartfelt Creations.
I love the new "Classic Editions" with all the wonderful pumpkins!
So for this card I wanted it to look distressed country- like. I added burlap and distressed white paper with lots of misting in the background.


Added some buttons and ribbon and this card is a super fast autumn card for anyone.


I tend to place lots of pop dots on many o my cards and layouts, but this card is pretty flat with only a few tiny pop dots behind the leaves. The little tag is typed up from my computer.


Have a great day!
 Be sure to stop by Heartfelt Creations Blog to see more fabulous designs from our DT.
Hugs

Tuesday, July 31, 2012

Peace Be with You

A new card that I made while my children were entertaining their father on his birthday! I snuck away for a tiny bit and whipped out this teal card. :) I made a card using these colors for Heartfelt Creations and I sent that for their display boards. So I really wanted to get these colors out again. Lots of layering of diecuts..I really couldn't make up my mind what to use? so I just kept layering...lol
I was feeling a little Becca, while I was making this card...although her cards are way over the top...my dream sometime....I decided to use a peaceful saying for this card and when my Roxy read it she said
 "and also with you" 
That is what I was thinking so it definitely gets the point across. :)
God give us more peace in our lives.


My pearl supply is getting smaller and smaller...oh no! so I used lots of liquid pearls. 
As for the spellbinders diecuts, I used labels 20, fancy tags, floral ovals, and morocan accents.


The SEI floral pattern paper has a little shimmer to it...so it really shines in the daylight. 
The tiny roses are prima, after my pirate card...i needed some flowers again! 


Have a great day and peace be with you! 
xoxo

Monday, July 30, 2012

Happy Birthday Old Buzzard!

Hi, Today is my husband's birthday :)
He is only 45 but we have this joke about calling each other old buzzard's sometimes....mostly becasue it gets harder to wake up for work in the morning and we tend to go to bed early....so we feel like old buzzards....lol 
So I wanted to make him a card with a buzzard and yet I needed it to be manly...I have had this pirate paper for a long time...so I finally used it. I also made the treasure chest out of black cardstock. I stamped woodgrain from Heartfelt Creations and embossed it in gold ink. I didnt have any gold coins so they are made out of gold paper and embossed with my cuttlebug. It is the same measurements as the tissue box in my earlier post. 


The balloons and bubble were made with my cricut and I just added quilling paper for strips and cut out one of the jolly roger's and glued it to the top of the balloon. The buzzard is a clipart printed out and I colored it with copic markers.


This is the first manly card I have made since Feb! Yikes! 
Have a great day! 

Sunday, July 29, 2012

Get Well Soon "Tissue Box Card"

Hello everyone! 
I sure hope you are having a great Sunday....we just had a ton of rain here in the Valley and well now Im sure it is super sticky! YUK!
So once again I was browsing at pinterest for inspiration for a "Get Well Soon" Card for a family member who has really had a rough year with illness and surgeries...
That is when I seen the cutest and one of the most creative cards I have seen in a while...it is a tiny tissue box on the card with a piece of tissue in it! Omgosh! Pure genius! You can see the original here
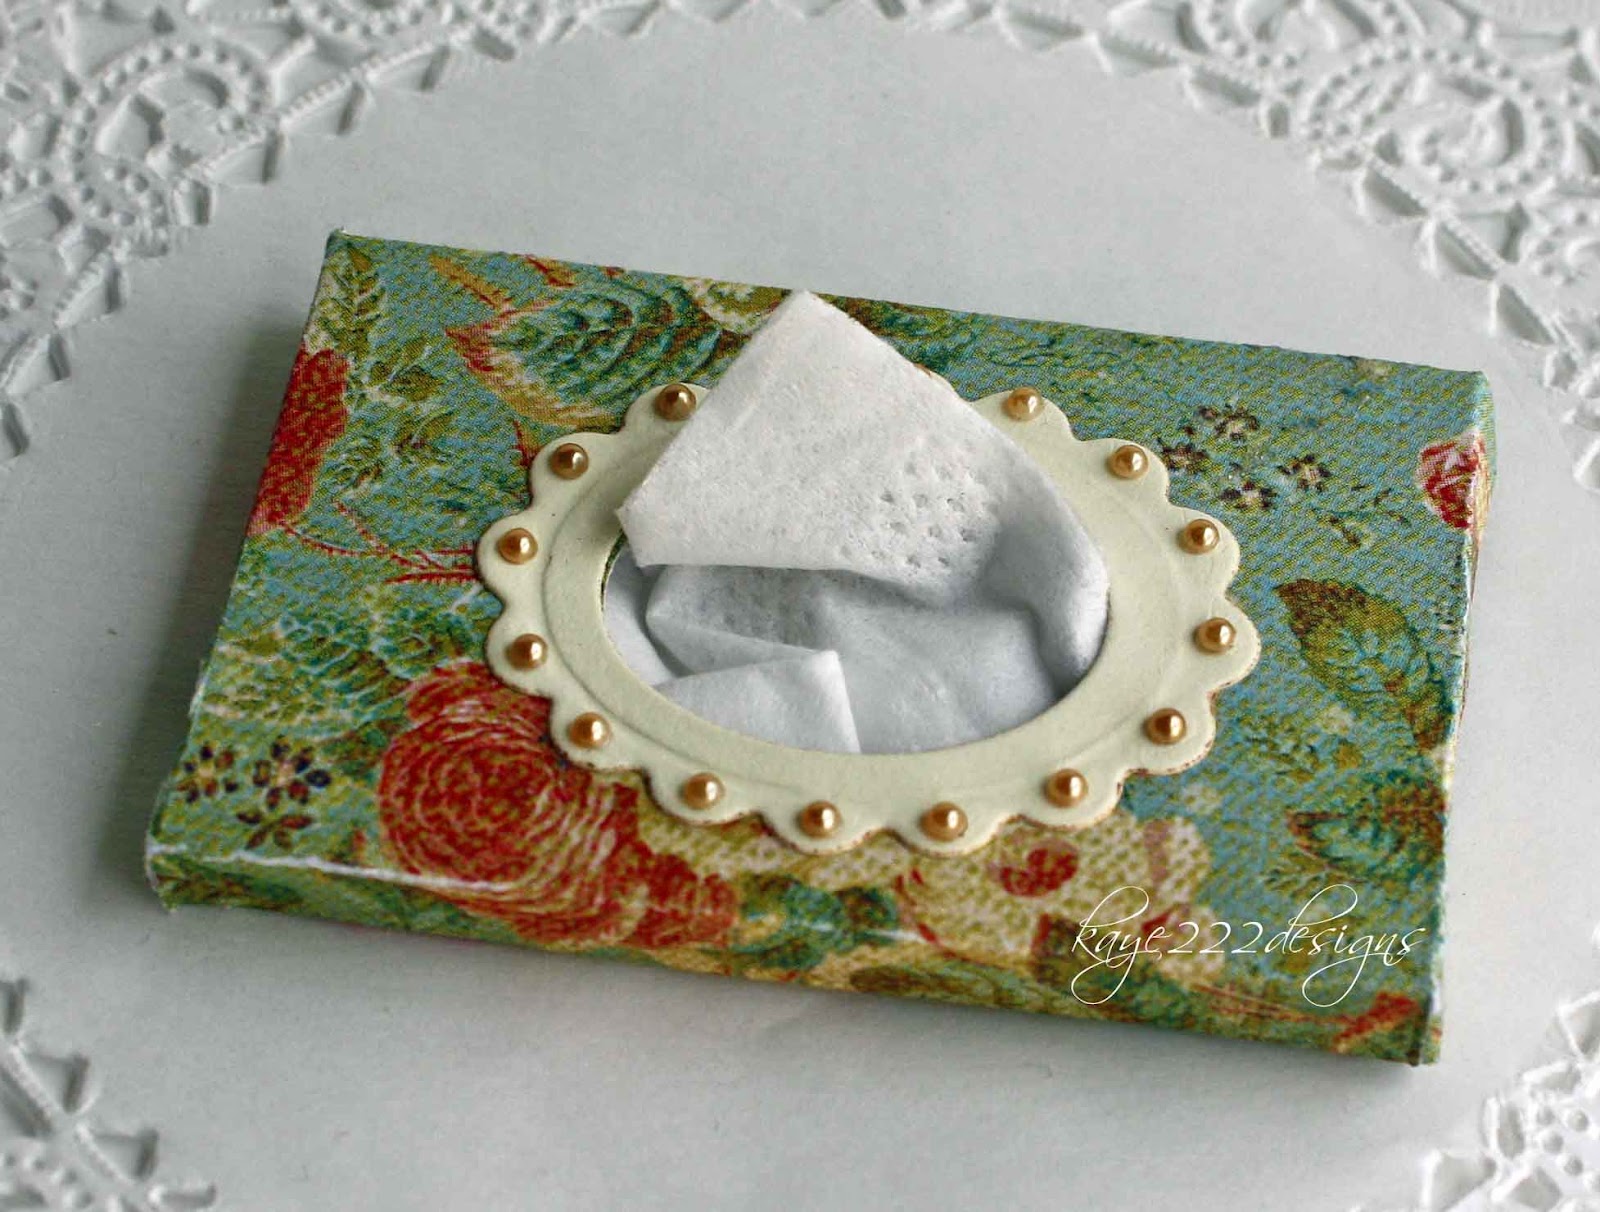
So here is my interpretation of the tissue box card.


I wanted to make it vintage looking since that has been my thing lately :)
I used spellbinders "Floral Ovals" in the background and for the little tissue hole I used "Classic Ovals" and "Lacey Ovals" After I diecut them, I added pearls to the edges. They are the super duper tiny ones that worked out perfectly. Since the tissue is white I added touches of white using the satin ribbon and framing the patterned paper in white. I distressed the edges not only because I tend to do it a lot but because it made it look like torn tissue paper. lol 


The sentiment I printed up on the computer using 2 different fonts...I really love that look :)


So here is the tissue box before it is glued down to the card. 
My box is 3D so if you pull out the tissue you can see the inside, which is the back of the patterned paper from K & Company. The tutorial for the original has just a top piece and a little larger.  
I needed my box to be a bit smaller to fit on the diecut, so here is my measurements:

2 inches x 3 inches times 2, 
Then score both pieces at the .25 inches all the way around. 
Next...diecut tissue opening...BEFORE you glue edges. 
(I actually did that and that is how I ended up making it a full box, but I like it)
Cut a slit on each corner and glue together.
Place back piece inside front and glue together. 
Lastly place a small piece of tissue inside.


Finished tissue box....almost Barbie size...just love it :)


Thanks for stopping by and have a great Sunday! 
Hugs! 

Thursday, July 26, 2012

A True Friend Remembers...

Hi, and welcome back to a new card that I made for a friend of mine. 
Her birthday is around the corner and I wanted to make a kind-of vintage colored card....she is getting old...lol...just kidding!
Lots of layering again with spellbinders diecuts and I distressed with ink on the background paper. 
There is also lots and lots of bling here too...just love bling!


The roses are made with "Bitty Blossoms" and I just added fairy dust glitter for the extra shine. 


The quoteis made from microsoft word with 2 different fonts to fit in the center of the diecut. I added a pearl on a brad to give it a little extra something. 
On the bottom right hand corner is a tag from Graphic 45. 


Hope she loves the card...
Have a great day! 
Hugs...

Wednesday, July 25, 2012

Heartfelt Wednesday's *Berry Sweet*

Hello my "berry" close friends! Today, I'm sharing with you a new layout that I made for Heartfelt Creations using their NEW "Classic Editions" collection. I really love the new raspberries, but let me tell you how I was struggling to find just the perfect layout to display them!  First of all, I am not the best colorer, but I really tried to make these berries shine with my favorite color "RED" :)
This photo of Roxy kind of reminded me of how someone would be out in the garden with her hat on....btw...that nose ring...is just faux....she knows how mother would just stroke out! 


As you can see here I used some pop dots make those berries pop out at you too! 


Here can kind of see the shine that I added to all the berries....yum!


So I had to add some little garden signs to my garden raspberry theme...just a little journaling and the title on them.


Thanks "berry" much for stopping by....be sure to check out all the wonderful creations this week made with the Heartfelt Creations stamps, diecuts and NEW paper line! 
Hugs!